For the LOVE of PAPER!!!

Tuesday, December 7, 2010

Birthday Girl Corset


Today I decided on an easel birthday card. I used the corset cut on the Tie The Knot cartridge and cut it at 4" with the layers. The striped background paper is from Making Memories (I think) I pop dotted the corset on and added the bottom sentiment that is from Fiskars. I used a corner punch to make the sentiment mount a little prettier and added three black gems on each side.

On the inside, I used a different Fiskars sentiment along with some more black gems and a black and gray and silver glitter striped paper from the DCWV Alphabet stack. I entered this is the My Pink Stamper birthday challenge http://www.mypinkstamper.com/and then the Gaby Abby Challenge at http://www.gabycreates.com/2010/12/card-for-gaby-abby-sei-challenge-9.html

Sunday, December 5, 2010

Wedding Monogram


I was asked to make a wedding card for a friend and I was really dying to use the new DCWV Street Lace so I made this 5x5 card. The mat sheet is from the DCWV Street Lace stack and the T monogram is cut from the Tie the Knot cartridge a 4", along with the shadow. The inside is a solid cream colored sheet with a mounted sticker sentiment from Making Memories. All of the corners are punched with Fiskars four way punch


Tuesday, November 30, 2010

Happy 18th!!!


Today I made a simple 5x7 card, no Cricut cuts. The paper is from the DCWV Alphabet stack which is really one of my favorites! The bottom is the 'A' sheet cut 5x5 and then mounted. The top polka dot piece is glittered polka dots from the same stack (I think the D monogram page). The black and white 'rings' ribbon across the seam of the two sheets is from American Crafts. I added a silver feathery ribbon across the top. The sentiment is from Fiskars and I mounted it on a silver glitter scrap piece and then a black.
On the inside, the sentiment is from a Scrappy Cat set and then I used a Martha Stewart border punch across the bottom and then the scrap striped piece from the front.


Monday, November 29, 2010

Give Thanks!


So I am a little late on my final Thanksgiving card for this year. It was a busy weekend! So, today's card was made using the Thanksgiving cartridge, and the 'Give Thanks' cut at 4". I then ran it through the flourish embossing folder. I can't recall where the brown paper is from but, the border punch is MS's Modern Garland punch and underneath, I have gold foil mounted. The leaves are silk craft leaves and the inside is an orange piece with the same border punch. I hope you all had a fabulous Thanksgiving holiday....now to get done with all of the Christmas cards and projects! Whew!

Saturday, November 27, 2010

Stylish Blogger Award


How sweet that Robin over at http://thecricutscrapper.blogspot.com/ awarded me with a Stylish Blogger award!!! THANK YOU Robin!! I am honored! There are a couple of rules to receiving the award.
1. Thank and link back to the person who gave you the award
2. Share 8 things about yourself
3.Pay it forward to 8 bloggers who you have recently discovered
4. Contact those bloggers and tell them about their award

OK, so 8 things about myself.....
1. I love to wrap...I have about 50+ rolls of just Christmas paper
2. I love to shop and I am a stackaholic
3. I have four sisters
4. I am first generation American on my father's side
5. I love ancestry
6. I love photography
7. My favorite holiday is Christmas
8. My little sis is graduating with her Bachelor's in 2 weeks - WOOOHOO

Now, for the eight fantastic ladies who share their talents:
http://scrapntiantx.blogspot.com/
http://scrapsticklepop.blogspot.com/
http://naniwale.blogspot.com/
http://myscrappycupcake.blogspot.com/
http://raechelscards.blogspot.com/
http://jennyscards.blogspot.com/
http://sweetsweetharmony.blogspot.com/
http://laurenscreative.blogspot.com/

Sunday, November 14, 2010

Indian Corn


Today I have tried to make Indian corn the way I like to see it! I used the Thanksgiving cartridge to cut the indian corn at 3" using Desing Studio. I cut the first layer in a cream color and then the second layer in a shiny maroon and cut the 'stems' off of the top so that the cream color would show through the top. DS came into use when I used the layer option of the indian corn. I did a hide contour on the middle ear of corn when I cut layer three in a shiny gold paper. The fourth/top layer was cut on DS with a hide contour on the three ears together and just cut this single ear. I was glad I used DS to do this because these ears of corn take a while to cut because of the scalloped effect to make it look like corn. Once I glued all of the layers together, I inked the edges of the corn in brown.


I honestly can't remember where the paper came from but, I thought it went pretty well. The teal color on the bottom was stamped and then punched with the Martha Stewart modern garland border. I 'hung' the corn using brown ribbon and then stamped another sentiment inside along with a small piece of the patterned paper.


Wednesday, November 10, 2010

Birthday Presents

Another simple card day. The printed mat is from The Paper Studio Birthday Extravaganza stack and the EK Success candles border punch. The ribbon is from a Target dollar bin set. The present on the left was cut from Joys of the Season at 2" and then embossed using the Sizzex 'stripes and scallops' folder. The present on the right is just a cut I made once I stamped the sentiment. The bow on the top was cut using the layer, shift function of the present key. On the inside, I used the same border punch and a Hero Arts stamp.


Sunday, November 7, 2010

The Pumpkin Patch

I made today's card business size with a craft paper base and then mounted green and a printed sheet from the DCWV Amber Autumn stack. I cut the pumpkin patch sign at 3" from Happy Hauntings and then trimmed off the jagged edges and added more brown paper to the post of the sign to make it taller. At 3" it cut bigger than I had expected so, I wanted to size it down a little more to scale. The vine, I cut at 2" from the October 31 cartridge and the pumpkins I cut in various sizes from 1/2" - 1 1/2" using the Pumpkin Carving cart.


Thursday, November 4, 2010

Birthday Shopping Wishes


Today's card is for my bff and shopping partner! I used the My World cartridge to cut the shopping cart (or buggy as she would call it) using a mirror silver paper, at 2". I trimmed up the wheels a little to make them a little more proportionate to the girl. Now, here's a tricky one on making the girl. I cut two different girls from the Sweethearts cartridge, both at 3 1/4", and put them together. The top of her is the wedding dress girl with the dress and bouquet trimmed off and the bottom of her is the 'first kiss' girl with the top trimmed off. I trimmed the hair as well to make it look like a style closer to hers and added an arm on the side so that she looked normal. The paper on the side is from The Paper Studio Poteeka Souffle, the sentiment from Fiskars and the ribbon on each side is from a set of ribbon cards I found at Tuesday Morning.

Tuesday, November 2, 2010

Almost Turkey Day


Well the Fantabulous Cricut challenge has inspired me to start my Thanksgiving cards! So today is my turkey card. I cut the turkey from the Thanksgiving cartridge at 4". Once I put the layer on, I decided it was too plain. I gave him an eye with a tiny brad and then I used brown glitter on the entire flourish. After the glitter on the flourish dried, I decided I still needed more so I added some stripes of glitter glue (orange, yellow, and brown) to his tail feathers. Much better!
So the printed mat paper is from the DCWV Autumn Splendor value stack. The ribbon on the bottom is from the dollar bin at Joann's. It's a Christmas ribbon but, it's maroon and went very well with this paper. The sentiment is from a chip collection from the Target dollar bin. Loving those dollar bins! On the inside, I added another sheet from this stack and then a freshly cooked turkey stamp! It's already November and turkey day is soon coming!!!

Monday, November 1, 2010

Thinking of You


Today is a sympathy card that I did using the Branch1 Frame cut from the Cindy Loo cartridge, cut at 4". The mat paper is from DCWV Linen Closet stack. I stamped the 'Thinking of you' sentiment onto a light colored square and then mounted it onto blue and brown and then pop dotted it in the center of the frame. On the inside, I added the same strip of printed paper from the front and a piece of ribbon from Martha Stewart crafts.

Sunday, October 31, 2010

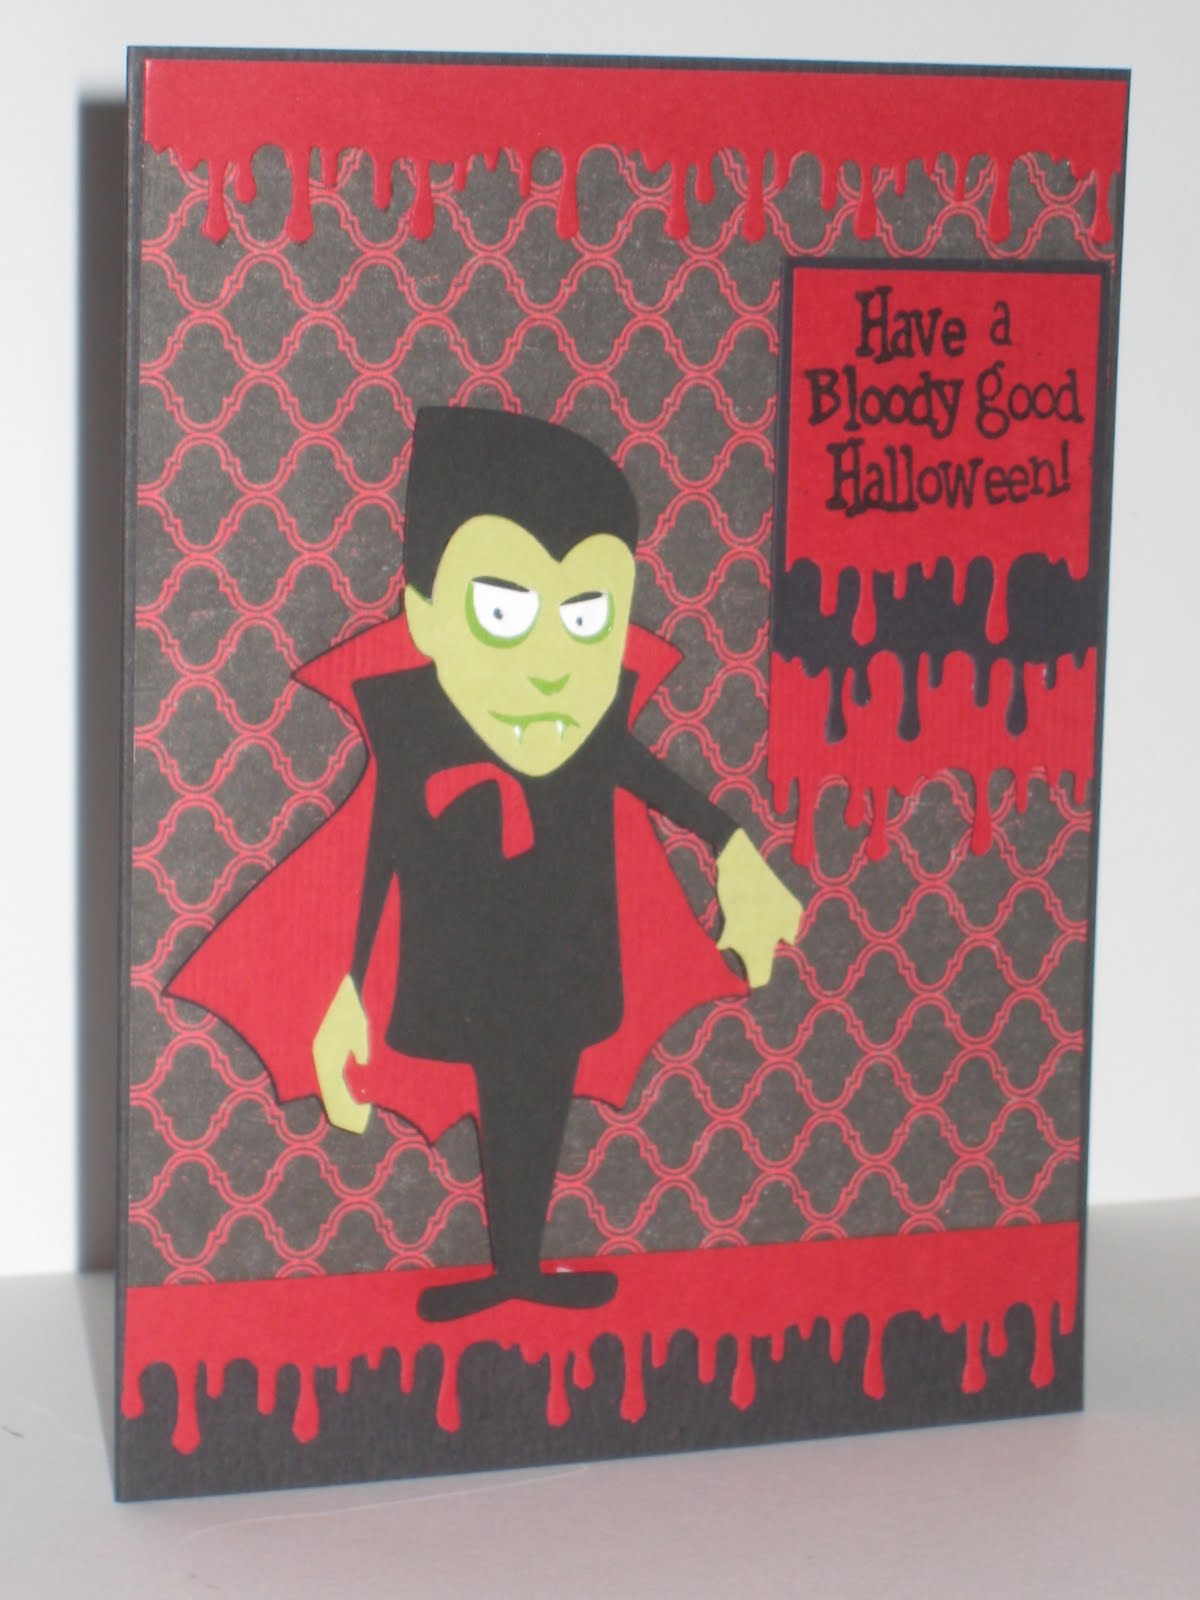
A Bloody Good Halloween


Happy Halloween today. Today, I made the vampire on Happy Hauntings (and the layers) at 3 1/2". The mat paper is from Martha Stewart as well as the drip border punch that I used on the top and bottom borders and the mounted sentiment. The stamp was from the dollar bin at Michael's. On the inside, I used the same paper across the top and the drippy goo border punch for the bottom.

Saturday, October 30, 2010

Pumpkin Carvings


Well, the title says it all! We carved our pumpkins today and this is what we ended up with. Using the Pumpkin Carvings cartridge, we cut the following templates: 9" mummy; 9" haunted house; 5" howling wolf; and 4" black cat.

Friday, October 29, 2010

Autumn Splendor Simple Card


Today's card is pretty simple. I used kraft stock as the base with a green mat and then a printed sheet from Me & My Big Ideas fall stack as the top mat. I inked the edged of the printed sheet and added a strip of shimmery brown ribbon down the side. I stamped the round sentiment on a yellow circle that I cut at 2 3/4" using Plantin Schoolbook and then mounted it on a solid maroon circle cut at 3" and pop dotted the entire thing. I finished it off with some green and orange gems. The inside, I added a sheet of the yellow and then used an EK Success border punch on both the left and right side and then glued green strips underneath to show off the border punch and then stamped the sentiment

Monday, October 25, 2010

A Graveyard Delight


Halloween is almost here, can you believe it? Today's card started with the skull borders and became a grave themed Halloween card that I think my niece will love. I cut two skull borders from the October 31 cartridge, both at 5". Then I took some G Studio purple glitter glue and added it to all of the vines of the border (once I started, I just couldn't stop) and the gunmetal Stickles to the skulls so that they would stand apart from the vines. Yes, it was a little time consuming but, I was really pleased with the end result. The mat paper is from the DCWV Hauntings stack. The gravestone is the first in the October 31 cartridge as well, cut at 4" and then inked with black. It took a while to decide what else to do and then I remembered the Halloween buttons I had bought in a Making Memories (I think) set and I decided to use it. When I laid it on the tombstone, I thought 'oh, black gem eyes would look great' so, before I glued the button on, I made dots with a pencil where I wanted the eyes to be, removed the button, added the gems and then glued the button on. The 'beware' sentiment is from a set of chipboards that I got in the $1 bin at Target. Halloween will be here soon......

Sunday, October 24, 2010

God Bless Your New Home


Back in March, my uncle's families house burnt to the ground and they have rebuilt and are now moved in. I made them this card using My World to cut the new house cut at 3 1/2". I inked the edges of the roof and removed the door and the garage door because these are the colors of their new house. The paper is from Matha Stewart Woodlands stack and the solid green, I embossed using the Floral Screen folder. The ribbon is from the Target dollar bin and the sentiments, front and inside, were cut from Wild Card. I cut 'God Bless You' and then cut off the 'you' and then I cut 'for your new home' and cut off the 'for'. I also used the printed card stock on the inside with some more ribbon to finish it off.

Pink Cat


Today's card is a standard A2 in a pink theme. I used the cat on the Cindy Loo cartridge (which I just got), cut at 3" with all the layers. The pink and white plaid paper is from DCWV Blossoms & Butterflies and the white is glittery so, I cut the cat shadow in glitter white paper. The sentiment is a Studio G sentiment that I mounted and used a Fiskars corner punch on. I used the Martha Stewart border punch across the bottom and another piece of white glitter paper under it. The ribbon is plain white and then ruffled dark pink from American Crafts. On the inside, I mounted a sheet of dark pink paper and then a small piece of the pink plaid on each side and used the same Fiskars corner punch!

Friday, October 22, 2010

Batty Over You


Today is another card with the October 31 moon. A friend asked me to make her a couple of Halloween cards and she loved my first moon card so, why not? I cut the moon (from October 31) at 3" in the same Core'dinations pearl paper and then the bats, I cut in different sizes from 1/4" to 1" from the Happy Hauntings cartridge. I didn't cut the layers for them but, I inked them around the edges which really made them look like they were coming right out of the paper. The glitter mat sheet and corner punch were the same that I used on the previous moon card. I added the ribbon from Michael's and then the sentiment from a G Studio's stamp onto a scrap piece of the pearl paper, border punched and mounted onto the same gray. That moon is just a fabulous cut, what can I say. :)

Saturday, October 16, 2010

Creepy Crawly Spider Egg Pod


Today's card is one of my favorites, a Halloween one for the MPS challenge! I think I will send it to my little sis for Halloween because I am sure she will appreciate it. The base of the card is gray 5x7 with a black layer and then the silver, white, black stripe paper from the DCWV All Dressed Up stack (love this stack). My original plan was to make the spider egg pod but, I made it bigger than what I like and cut it down to what you see here. I hand cut the tear drop shape using a scrap piece of black cardstock. Then, I covered the front with adhesive tape and added some cotton to it from an unrolled cotton ball. I cut some little spiders about a month earlier that were actually a layer of one of the Happy Hauntings framed cuts. I added the spiders and then covered the entire thing with a small piece of white panty hose.

The spiderweb was cut from the October 31 cartridge and the egg pod was glued into the center of the web to 'drip' down from the web. I added a couple more larger spiders to the outside and a pearl gem to one of the backs. The ribbon is from Martha Stewart Crafts and I punched the bottom of the black mat and the top mat using the Marta Stewart drippy goo border punch. I am soooo pleased at the way this one turned out!

Thursday, October 14, 2010

CARS Reward Chart

So, my son recently started kindergarten and they have a system for moving their Popsicle stick when they've done something they shouldn't, and a reward system for not moving their stick. Since that system works for school, I decided I wanted to do a rewards chart for home as well. My son loves the movie CARS and so I decided to make the chart a race track. I cut 14 pieces of track at 3" each, 4 corners and 10 straight pieces. I glued strips of magnet to the back of each piece and he gets to add a road piece every day that he has a good home day. When he gets 14 pieces, he gets to pick something out at the store.


We were struggling to find a place to display the race track so that other little hands don't get to it and we decided on the back of the door that leads to our garage. I took a 15"x22" sheet of paper and cut it down to 12"x22" and then added two pieces of CARS ribbon that I got on clearance at Walmart a while back, and then two pieces of solid black ribbon to frame the sheet. I attached the sheet to the top of the door and the magnets hold nicely.

As a bonus for him, I made Lightning McQueen for him and added it in the center although it too is a magnet and can be moved. He loves it and wants all of the other CARS characters so, we decided that, for each week that he doesn't move his stick at school, the entire week, I will let him pick a character that he wants to add to his racetrack and I will make it. He's very excited about the concept of it all and loves adding pieces to the track, I definitely think it's incentive for him and I will post more pictures of the new characters as I fill in the space!