For the LOVE of PAPER!!!

Showing posts with label Happy Hauntings. Show all posts

Sunday, May 5, 2013

Vintage Halloween


I know it's not the season but I made this card last year and sent it in for submission to Cricut magazine but, it wasn't chosen.   Authentique has a link challenge going on for National Scrapbook Day so, I thought I would post it and link because I still love it so!!  This is one of my favorite Halloween cards (that I've made).  All of the paper on this card (except for solids) are from the Authentique Glowing collection which I LOVE!! 

The framed witch is the frame7 cut from Happy Hauntings, with the layers, at 4".   I used a fiskars punch on the corners and then inked the edges with black ink.   I used some ruffled orange and cream ribbon from American Crafts and then pop dotted the mounted from over top.   The sentiment is from Studio G and says "best witches".  

Sunday, November 7, 2010

The Pumpkin Patch

I made today's card business size with a craft paper base and then mounted green and a printed sheet from the DCWV Amber Autumn stack. I cut the pumpkin patch sign at 3" from Happy Hauntings and then trimmed off the jagged edges and added more brown paper to the post of the sign to make it taller. At 3" it cut bigger than I had expected so, I wanted to size it down a little more to scale. The vine, I cut at 2" from the October 31 cartridge and the pumpkins I cut in various sizes from 1/2" - 1 1/2" using the Pumpkin Carving cart.


Sunday, October 31, 2010

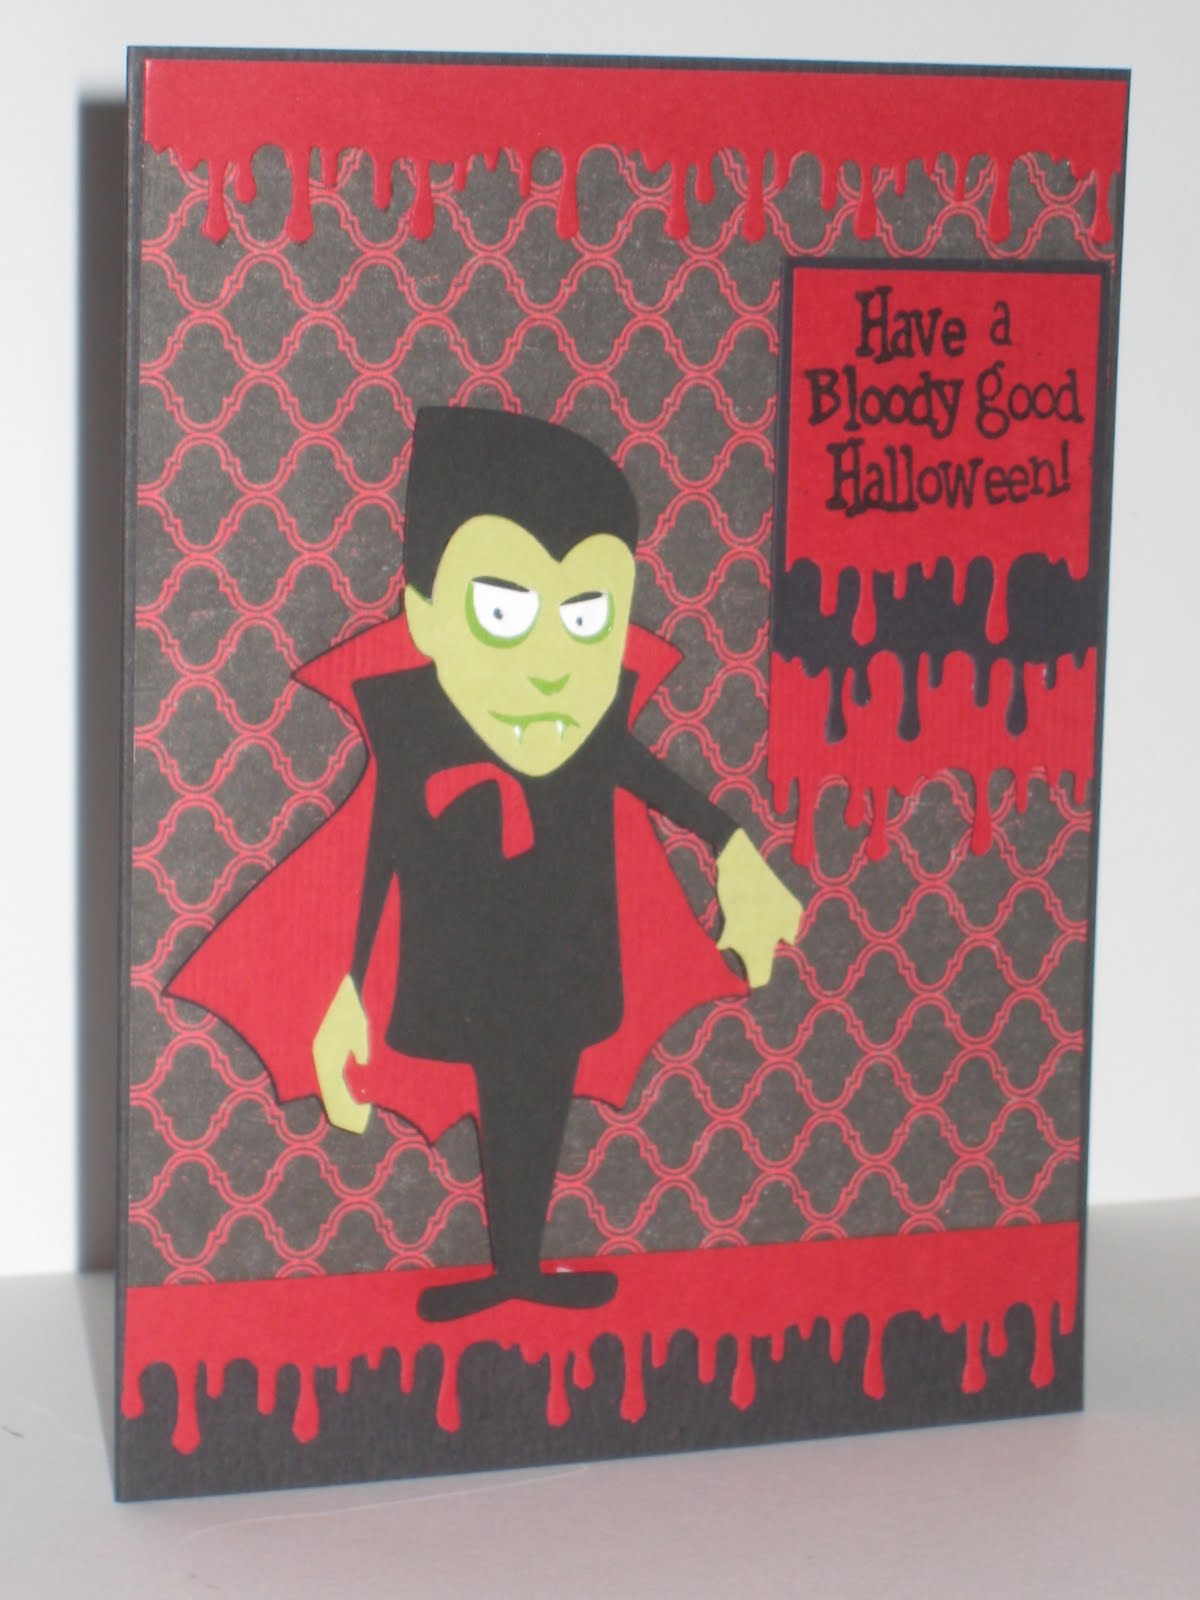
A Bloody Good Halloween


Happy Halloween today. Today, I made the vampire on Happy Hauntings (and the layers) at 3 1/2". The mat paper is from Martha Stewart as well as the drip border punch that I used on the top and bottom borders and the mounted sentiment. The stamp was from the dollar bin at Michael's. On the inside, I used the same paper across the top and the drippy goo border punch for the bottom.

Friday, October 22, 2010

Batty Over You


Today is another card with the October 31 moon. A friend asked me to make her a couple of Halloween cards and she loved my first moon card so, why not? I cut the moon (from October 31) at 3" in the same Core'dinations pearl paper and then the bats, I cut in different sizes from 1/4" to 1" from the Happy Hauntings cartridge. I didn't cut the layers for them but, I inked them around the edges which really made them look like they were coming right out of the paper. The glitter mat sheet and corner punch were the same that I used on the previous moon card. I added the ribbon from Michael's and then the sentiment from a G Studio's stamp onto a scrap piece of the pearl paper, border punched and mounted onto the same gray. That moon is just a fabulous cut, what can I say. :)

Saturday, October 16, 2010

Creepy Crawly Spider Egg Pod


Today's card is one of my favorites, a Halloween one for the MPS challenge! I think I will send it to my little sis for Halloween because I am sure she will appreciate it. The base of the card is gray 5x7 with a black layer and then the silver, white, black stripe paper from the DCWV All Dressed Up stack (love this stack). My original plan was to make the spider egg pod but, I made it bigger than what I like and cut it down to what you see here. I hand cut the tear drop shape using a scrap piece of black cardstock. Then, I covered the front with adhesive tape and added some cotton to it from an unrolled cotton ball. I cut some little spiders about a month earlier that were actually a layer of one of the Happy Hauntings framed cuts. I added the spiders and then covered the entire thing with a small piece of white panty hose.

The spiderweb was cut from the October 31 cartridge and the egg pod was glued into the center of the web to 'drip' down from the web. I added a couple more larger spiders to the outside and a pearl gem to one of the backs. The ribbon is from Martha Stewart Crafts and I punched the bottom of the black mat and the top mat using the Marta Stewart drippy goo border punch. I am soooo pleased at the way this one turned out!

Saturday, October 9, 2010

Glow in the Dark Ghosts


Today's card was an experiment for me. On my last trip to Joann's I found some glow in the dark dimensional writing glue. How cool, right? So, I bought it and then a friend asked me if I could make a few Halloween cards for her. I started with a solid 5x7 lime green base and then mounted solid black and then the plaid sheet from a Martha Stewart Halloween stack. I added some Recollections brand mat finished black brads that have a bit of a sparkle, to each corner and then a strip of thick black ribbon with another strip of the lime green ribbon on top.

The ghosts were cut at 4" and 2 1/2" from the Happy Hauntings cartridge and then I added the glow in the dark 'glue'. On the smaller ghost, I used my finger to smooth out the 'glue' but, on the larger one I didn't so, the larger one has some texture to it. It was a success though and as you can see from the bottom picture (although not a very good one) it worked! My son LOVES it! Oh, and the Boo word art at the bottom was cut using Happy Hauntings as well. I cut it first at 2" but, it turned out rather large so, this one I cut at 1". Warning: it didn't cut the best, the black line between the two 'o's' was drawn in by hand because it was too thin when cut at 1"


Wednesday, October 6, 2010

BOO!!!


If you caught my Glow In the Dark Ghosts card post then, you read that I cut the Boo work art from the Happy Hauntings cartridge too big for that card when I cut it at 2". I didn't want to waste it though, it's really cool. I used an orange base for the card and then black pumpkin cardstock from the DCWV Hauntings stack as the mat. I corner punched all of the corners with a Fiskars punch and then added a 1" wide strip of the same orange paper across the top. I glued a piece of ribbon on that (from Hobby Lobby I think) and then pop dotted the Boo word art. I like the more sophisticated look of this card and I didn't waste the cut that I made!

Wednesday, August 25, 2010

Enter if You Dare

SO, I am sooo ready for the fall. Cool weather, football, and Halloween!!! I am a big fan of Halloween so, naturally, I've purchased the Pumpkin Carving, October 31, AND the Happy Hauntings cartridge. Love all of them! Naturally though, they are inspiring me to make some Halloween themed cards. Today I have the 'enter if you dare' card. This is a 5x7 gate fold that was inspired by the second gate on the October 31 cartridge. This gate cuts in two different pieces so, I thought how perfect to cut the gate for a gate fold card. The card base is solid black card stock and then I mounted a printed sheet from the DCWV 'The Haunting Collection' stack. I cut the gate at 4 1/2" out of solid black cardstock. When you get ready to glue these gates though, you need to be quick about it. I just dab dots of glue all over using the small Zig glue pen. If you don't do it quickly, the first ones will dry by the time you get the last ones. :)

I found the "Enter if you Dare" phrase on the Happy Hauntings cartridge and decided to cut it at 1 3/4" with a dark purple base and a black top layer and then I glued only half of it and attached it to the card so that it isn't permanently stuck to the card, preventing the card from being opened. Then I decided on bats...hmmm. Lots of bats in these cartridges, in some different layers. I love the bat on the Happy Hauntings cart but, when I cut it, it was bigger than what I wanted for the card and the purple top layer was VERY thin so, I didn't think I could cut it smaller without it ripping. Instead, I chose the bat from frame3, layer 1 shift and the one from the cat key, layer function, both at 7 1/2". Since these bats were actually layers on other cuts, I needed to cut them in a larger size to be sure they were big enough to put on the card. I cut two of each, a top layer in black and a bottom layer in purple.


On the inside, I mounted a grey piece of Archiver's card stock, cut a bit smaller than 5x7 . I cut the graveyard from the Happy Hauntings cartridge as well. It was the graveyard shift cut and then the graveyard layer 1, both at 3 1/2". I used my Design Studio to see test the different sizes before cutting. I don't save it as a cut file but, I do like to check it out on DS before cutting so that I don't waste paper when I do the actual cut. Once I cut the top 'grass' layer, the tips of the grass were white from the core of the card stock so I inked them with a matching green color to hide the white core. Then I decided to ink the edges of the tombstones to give them more of an aged look so, I did that using the Cat's Eye alabaster ink pad. I had to trim a little from the sides of the graveyard cut so that it would fit in the card and then ink a little more. This led to me ink the edges of the gray mat in black, I think it adds to the spooky Halloween feel of the card. I added some more bats at the top to complete the inside.