For the LOVE of PAPER!!!

Showing posts with label Tie the Knot. Show all posts

Sunday, February 6, 2011

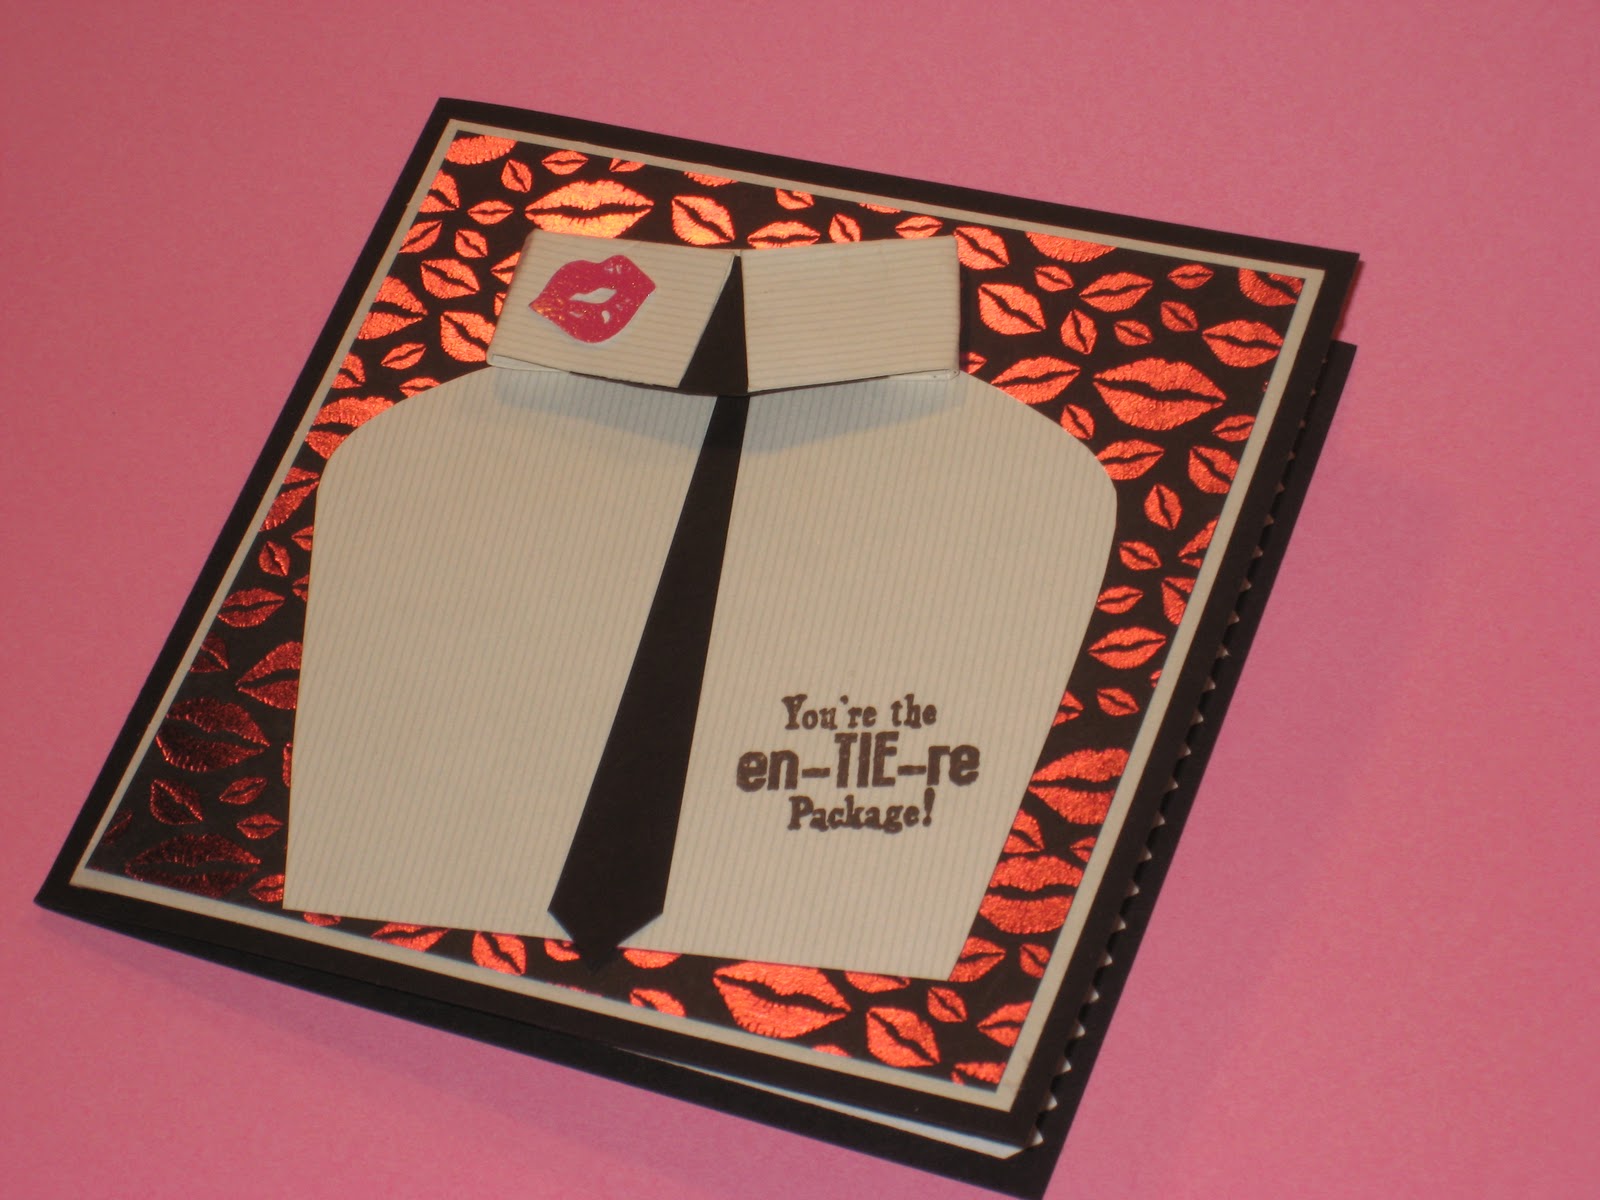
Is that Lipstick on your Collar?

I needed to make a VD card for my husband and I hadn't gotten to his yet but, I got some inspiration from a couple of blogs so, here is it.....lipstick on the shirt collar!

I wanted to use the lip sheet from the DCWV Rock Star stack and I wanted to use the lip cut from the Tie the Knot but, wasn't sure about the rest.   Then I got the idea and looked through my cartridges but, couldn't find a shirt and tie so, I figured it couldn't be that hard to make by hand and have the collar a little 3 dimensional.  So, the shirt & tie is entirely formed/cut by hand.  The paper for the shirt is black cardstock and a pinstriped sheet from the DCWV Linen stack.

The lips were cut at 1/2" using only the blackout and top layer of the lips from the Tie the Knot cartridge.   The light colored mat is also from the Linen stack and the pink lip sheet is from the DCWV Rock Star stack.   The sentiment is from the Scrappy Moms 'Charmed Life' set. 


On the inside, I used a sheet of white cardstock and an EK Success punch on the right side with a strip of the lip paper down the left side.   Hope he likes it.  He's truly is one of a kind!

Tuesday, December 7, 2010

Birthday Girl Corset


Today I decided on an easel birthday card. I used the corset cut on the Tie The Knot cartridge and cut it at 4" with the layers. The striped background paper is from Making Memories (I think) I pop dotted the corset on and added the bottom sentiment that is from Fiskars. I used a corner punch to make the sentiment mount a little prettier and added three black gems on each side.

On the inside, I used a different Fiskars sentiment along with some more black gems and a black and gray and silver glitter striped paper from the DCWV Alphabet stack. I entered this is the My Pink Stamper birthday challenge http://www.mypinkstamper.com/and then the Gaby Abby Challenge at http://www.gabycreates.com/2010/12/card-for-gaby-abby-sei-challenge-9.html

Sunday, December 5, 2010

Wedding Monogram


I was asked to make a wedding card for a friend and I was really dying to use the new DCWV Street Lace so I made this 5x5 card. The mat sheet is from the DCWV Street Lace stack and the T monogram is cut from the Tie the Knot cartridge a 4", along with the shadow. The inside is a solid cream colored sheet with a mounted sticker sentiment from Making Memories. All of the corners are punched with Fiskars four way punch


Sunday, October 3, 2010

My Little Sis's First Creation!!!!


So, my little sister decided to make a card for our cousin's wedding and this was her very first paper creation! She used the the shoes from the Tie the Knot cartridge and cut several pairs at 1/2" each. Wow, what little shoes! She took the men's shoes and used Glossy Accents to make them shine and then found a sentiment on line that we printed on the printer. The inside says 'Dancing with your Heart is another'. The dashes between dance steps were cut using a punch and the ribbon is from Hobby Lobby. We were both very happy with the turnout, hope our cousin was too! ;)

Saturday, August 7, 2010

Wedding Invites


My post today is one that I have been working on for weeks. I made the 180 invitations for my cousin's September wedding! What a job it was. The cutting wasn't bad but, as you will see, there were soooo many layers to glue and that was just a boring job. :) I've never done something on this big of a scale but, I am glad I did it, it was a learning experience!


The actual invitation is the four fold with the crown on the Sentimentals cartridge. I used Design Studio to hide the contour of the crown shape so that the four fold would be plain. The dimensions of the four fold were 9.509 x 10.175". This size makes the invite a 4x4 when the four flaps are folded in. I then used my guillotine cutter and cut the red square at 4x4 to fit in the center. The pearl paper with the wording was cut at 3 3/4 x 3 3/4". After scoring and folding all of the four sides, I added a monogram.

The monogram is mounted on a fancy frame that I used DS again to alter. The fancy frame is the first frame on the Storybook cartridge. It's more of a rectangle so, I altered it to 2x2" and recreated it as many times as would fit a sheet. The 'S' monogram is cut using the Tie the Knot cartridge, monogram creative feature. The 'S" was tehn glued onto the fancy frame and then embossed using the Swiss Dots embossing folder. After embossing, the pearl gem was added in the center of the scroll on the 'S' monogram and then the entire monogram was attached to the invitation. On the bottom, I used a permenant glue dot and on the top, I used a repositionable glue dot so that the invite could be opened and closed easily.

The invite also included the reception information card, the RSVP card and an accomodations information card. All three were cut using the guillotine cutter and then mounted together, black, red and then the pearly white paper with the information printed.

Tuesday, August 3, 2010

Mr & Mrs


A wedding card for a black, white, and red themed wedding. The scalloped oval was cut from the Wild Card cartridge. I used Design Studio to modify the cut. The cut is using the frame creative feature of the cartridge. I did a 'hide contour' on the interior oval line so that it didn't cut as a frame. Then I did a hide coutour of the outside line of the same cut so that it was an exact oval that fit inside my scalloped oval. The polka dot paper is from the Colorbok stack again. I then cut the 'Mr & Mrs' cut using Tie the Knot. The ribbon is from the Flower Factory.

Sunday, August 1, 2010

You're going to be a beautiful bride!


Today's card was made for my cousin's wedding shower. I've seen her in her dress but, just as a quick try on. Can't wait to see how pretty she will be on her wedding day so, I chose the dress from the Tie the Knot cartridge. The black and white print paper is from a Colorbok stack I got at WM. I cut the dress at 5". I cut the shadow in solid black and then the top dress layer in white pearl paper. The sentiment is a stamp that I mounted and hand cut. I cut the scallop border using a fiskars border stamp and the inside had white paper so that you could see the border better.

Monday, June 28, 2010

Anniversary Card


Here is the Anniversary card I made for my husband. I used the Tie The Knot cartirdge and a standrard A2 card. I cut the champagne glasses and all the layers to go with them and then the phrase 'Happily Ever After'. The patterned background paper is from The Simple Elegance stack from The Paper Studio. It was quite difficult to cut the phrase as it's a very thin cut....and just as difficult to glue quickly. :) I glued the 'Ever After' to the left over piece of patterned cardstock and then used a corner punch to spice it up a little....although, no matter what I did, I could not get the interior picture to post horizontally on this post. I gave up after 12 tries!

Tuesday, June 15, 2010

Wedding Shower Invites


I finally finished all 120 wedding shower invites for my cousin's shower next month. I now have to switch gears to the actual wedding invites! I love that she is so excited about all the details of her wedding. I talked to her fiance this weekend at a wedding and he thanked me for all my hard work but, what was really nice to hear, without him even saying it, is how much he wants her to have the kind of wedding she has always wanted. You just don't see that as much as you should, right? And I really believe that if you aren't into your wedding, you probably won't be into your marriage. Congrats to them, I look forward to helping with the shower and being there on their big day!!

The invites were the pocket fold envelope made with the Sentimentals cartridge. I used the hide contour in Design Studio to remove the fleur-de-lis cut from it. I don't know the exact cut size but, I was able to cut two per 12x12 sheet. I also used Tie the Knot to cut the 'S' monogram at 2" and then embossed them with the Swiss Dots folder. I was able to cut 20 monograms per page when using the Auto Fill feature on the Cricut. The actual invite I cut in black and then mounted the white to it. I punched a hole in the top and added the 'swiss dot' ribbon.

Monday, May 3, 2010

MPS Challenge #4 - Using your least favorite Cartridge


So, I used Tie the Knot for this card. It is not my least favorite but, I don't use it much so, I took the leap for something un-wedding related. It looks better in person with the pearl finished white paper behind the cherry blossom branch!