For the LOVE of PAPER!!!

Monday, July 19, 2010

If the Crown Fits...


The next few posts will be projects instead of cards. We just wrapped up my daughters princess birthday party and of course, I used my Once Upon a Princess cartridge to make several things and help with the decorating!


My first project was the Crown Loot bags. I used the Once Upon a Princess and cut the crown and all the layers at 3 1/2". I cut alternating colors to coordinate with the bags I purchased form Target. After I glued all the layers together, I decided some stickles in the center of the 'gems' were needed. I used the silver. I then added a tag to each bag with the childs name (example: Princess Emily & Prince Andrew). I used a large Tag punch that I already had to cut two different colors for each tag. A couple weeks before the party, I picked up a Martha Stewart Crafts Crown shaped punch for $4.50 at WM, just in time to help with the party. I used the Crown punch to cut a crown out of the top tag and then glued the top tag to an alternate color solid bottom tag!

Sunday, July 11, 2010

A little birdie told me...


Happy Birthday Em!!!! Made this one for my friend's daughter's 6th BD. I used Core'dinations solid card stock to make the birdie from Create A Critter at 3 1/2". The printed paper is from The Paper Studio Poteeka Souffle stack. I think the ribbon is from Michael's and the sentiment from the Fiskars kids birthday stamp set. I added a strip of the peach colored paper and the printed to the inside as well as another birthday sentiment.

Saturday, July 10, 2010

Zoo Loot Bags


I am uploading all of my pics from my daughter's BD today and I realized that I never posted the pics of the loot bags that I made for my son's zoo BD party earlier in the year. I used the Animal Kingdom cartridge to make all of the animals with layers. I used a Child's Year and DS to weld all the kids' names together. I don't have a picture but, I created a second name file on DS to cut names for each of the kids' water bottles. I used some heavy duty decal labels and put them on over the water bottle label and then glued the names on. It worked perfectly and I didn't have any issues once the bottles started to get wet.

Friday, July 9, 2010

Fleur Di Lis


A birthday card for my niece who loves all things Fleur Di Lis. I hope she likes this one. I used DS to create a shaped card using the Sentimentals cartridge. This is actually a card shape on the cartridge but, I welded two together which made the one side straight and then I used some pirinted paper to give the card back the original shape about 1/4" smaller than the card size. I cut the Fleu Di Lis from Sentimentals as well. There is a tag function that has the shape so, I did a Hide Countour on the tag portion and just cut the shape using the metallic silver paper. I cut a liner for the inside, also 1/4" smaller than the card and stamped my sentiment!

Tuesday, July 6, 2010

Happy Birthday Panda


Ready for a color change? Today's card is a birthday card for my sister in law. The printed paper is from DCWV 'All Dressed Up' stack. The panda is cut from the Pagoda cartridge at 3". I used white pearly paper for his top layer. I couldn't stop after the 4th of July. :) The ribbon at the bottom is from Martha Stewart Crafts and the sentiment is recycled from a greeting card I received. ;) On the inside, I cut the bamboo at 4" and used the left over printed cardstock.

Sunday, July 4, 2010

Independence Day!!!


Happy 4th of July! My last card is a 4x9 Independence Day card. I cut the Independence Day phrase from the Independence Day cartridge at 3". The printed paper is from The Paper Studio 'All Seasons' stack and I used a corner punch on the corners. I also cut three stars at 3" and layered behind the Independence Day phrase. On the inside, I cut the three star border from the Stand and Salute cartridge using the border function and finished with 'Celebrate Freedom'. Happy 4th of July!!!!

Saturday, July 3, 2010

Flying High on 4th of July


Today's card was cut with A Child's Year cartridge. This particular cartidge doesn't have layers outside of shadow so, I cut this boy on the firecracker at 4" using the blue pearly paper again with a red shadow. I added some smaller stars at the end and some ribbon. The star print paper is from the Colorbok 'School Life' stack. On the inside, I added more paper strips and the 'Celebrate Freedom' stamp.

Friday, July 2, 2010

Firecracker


I changed it up a little and made a 4 x 9 1/4" card today. I used a different printed paper from the DCWV 'The Stack 6' and cut the firecracker and all layers from the Independence Day cartridge at 3". I then used some gold stickles to 'decorate' the spark. The 4th of July phrase was cut at 2 1/2" using the Stand & Salute cartridge and both layers. When I tried to cut it smaller, it would tear so, 2 1/2" was the smallest I could go. For the inside of the cartridge, I cut a 3 1/2" star using the same printed paper and then stamped the 'celebrate freedom' in the center.

Thursday, July 1, 2010

Let Freedom Ring


Today's card is another 5x7. The printed paper is from The Paper Studio 'All Seasons' stack. I used a 1 1/2" strip of solid red in the center and then cut the phrase 'Let Freedom Ring' at 4" using Stand & Salute. On the inside, I cut another 1 1/2" strip, using white paper. I then cut the liberty bell from the Independence Day cartridge, using the layer function.

Wednesday, June 30, 2010

Fireworks


The next card is a 5x7 Fireworks card using Stand and Salute. I used some printed paper from the DCWV, The Stack 6. I cut the blue fireworks using a pearl finished paper at 4" and then, the red at 3 1/2". The inside, white fireworks were cut at 3 1/2" using white glittered paper. Again, I used my Celebrate Freedom stamp on the inside.

Tuesday, June 29, 2010

United We Stand


I got the Stand & Salute cartridge a couple of weeks ago as well as the Independence Day Solutions Cartridge. I also got a Stampendous clear stamp that says 'Celebrate Freedom'. I decided I would make some 4th of July cards this year for the people I know that July 4th has special meaning for or just enjoy celebrating it every year. So, for the next six days, I am going to post a new July 4th themed card. I hope you enjoy them!

This first card I made for my uncle who is a veteran. As I get older, I realize how important it is to thank those who serve and those who have served. I know it means so much to him so, I hope he likes the card.

I used all solid paper making this one. I cut the 'United We Stand' phrase using the FRAME feature on Stand & Salute. I cut it at 4 1/2" and it fit perfectly for my 4 1/2 x 6 3/8 card. I then cut the flag banner at 3 3/4" using the Independence Day cartridge, cutting all three layers. Last was the 'Saluting Man' from the Stand & Salute cart. I cut two of them at 3", blackout & shadow only, I wanted to keep it plain. On the inside, I cut 1/2" strips of red, white, & blue paper and added them to the bottom & I used my 'Celebrate Freedom' stamp.

Monday, June 28, 2010

Anniversary Card


Here is the Anniversary card I made for my husband. I used the Tie The Knot cartirdge and a standrard A2 card. I cut the champagne glasses and all the layers to go with them and then the phrase 'Happily Ever After'. The patterned background paper is from The Simple Elegance stack from The Paper Studio. It was quite difficult to cut the phrase as it's a very thin cut....and just as difficult to glue quickly. :) I glued the 'Ever After' to the left over piece of patterned cardstock and then used a corner punch to spice it up a little....although, no matter what I did, I could not get the interior picture to post horizontally on this post. I gave up after 12 tries!

Saturday, June 26, 2010

Princess Castle Invites


I have completed the Princess Castle Invites for my daugther's BD party. I used the Once Upon A Princess cartridge. To make this one, I used DS for the base of the card. I chose the shadow option of the castle in 5" and then selected another castle and used the flip option to turn it the opposite way so that they fit togehter perfectly when folded. I lined them up and used the weld option to cut them as once piece, creating a folded card. All of the layers were then cut at 5" as well.


I printed the interior invitation wording on a lightweight cardstock. I could cut two 'invites' per page but, I had to use DS to line up the wording with the first layer cut of the castle so that it would cut the wording correctly to fit on the layer and then in the card. Pretty easy to do with a little trial and error. I am happy with the way they turned out. Now to get to work on a banner, loot bags, and some other items for the party! :)

Tuesday, June 22, 2010

Golf BD Card


I made this quick golfer BD card for a friend's husband. He loves golf & Carolina Blue!! I used a standard A2 sized card. The Sports Mania cartridge, male golfer, using the frame function. The rest I cut with my trimmer. I was giving my friend a quick Cricut how to while she was here for a visit so, as I said, it was a quick card.

Tuesday, June 15, 2010

Wedding Shower Invites


I finally finished all 120 wedding shower invites for my cousin's shower next month. I now have to switch gears to the actual wedding invites! I love that she is so excited about all the details of her wedding. I talked to her fiance this weekend at a wedding and he thanked me for all my hard work but, what was really nice to hear, without him even saying it, is how much he wants her to have the kind of wedding she has always wanted. You just don't see that as much as you should, right? And I really believe that if you aren't into your wedding, you probably won't be into your marriage. Congrats to them, I look forward to helping with the shower and being there on their big day!!

The invites were the pocket fold envelope made with the Sentimentals cartridge. I used the hide contour in Design Studio to remove the fleur-de-lis cut from it. I don't know the exact cut size but, I was able to cut two per 12x12 sheet. I also used Tie the Knot to cut the 'S' monogram at 2" and then embossed them with the Swiss Dots folder. I was able to cut 20 monograms per page when using the Auto Fill feature on the Cricut. The actual invite I cut in black and then mounted the white to it. I punched a hole in the top and added the 'swiss dot' ribbon.

Sunday, June 13, 2010

Graduation Card #2


The card for our second graduation party that we didn't get a chance to go to. I used Design Studio to weld together the rectangle shape and the numbers from A Child's Year cartridge to make this 2010 card. The inside is lined with a gray cardstock that is printed with Graduation sentiments. I stamped the same sentiment on this card as I did the previous graduation card.

Saturday, June 12, 2010

Graduation Card #1


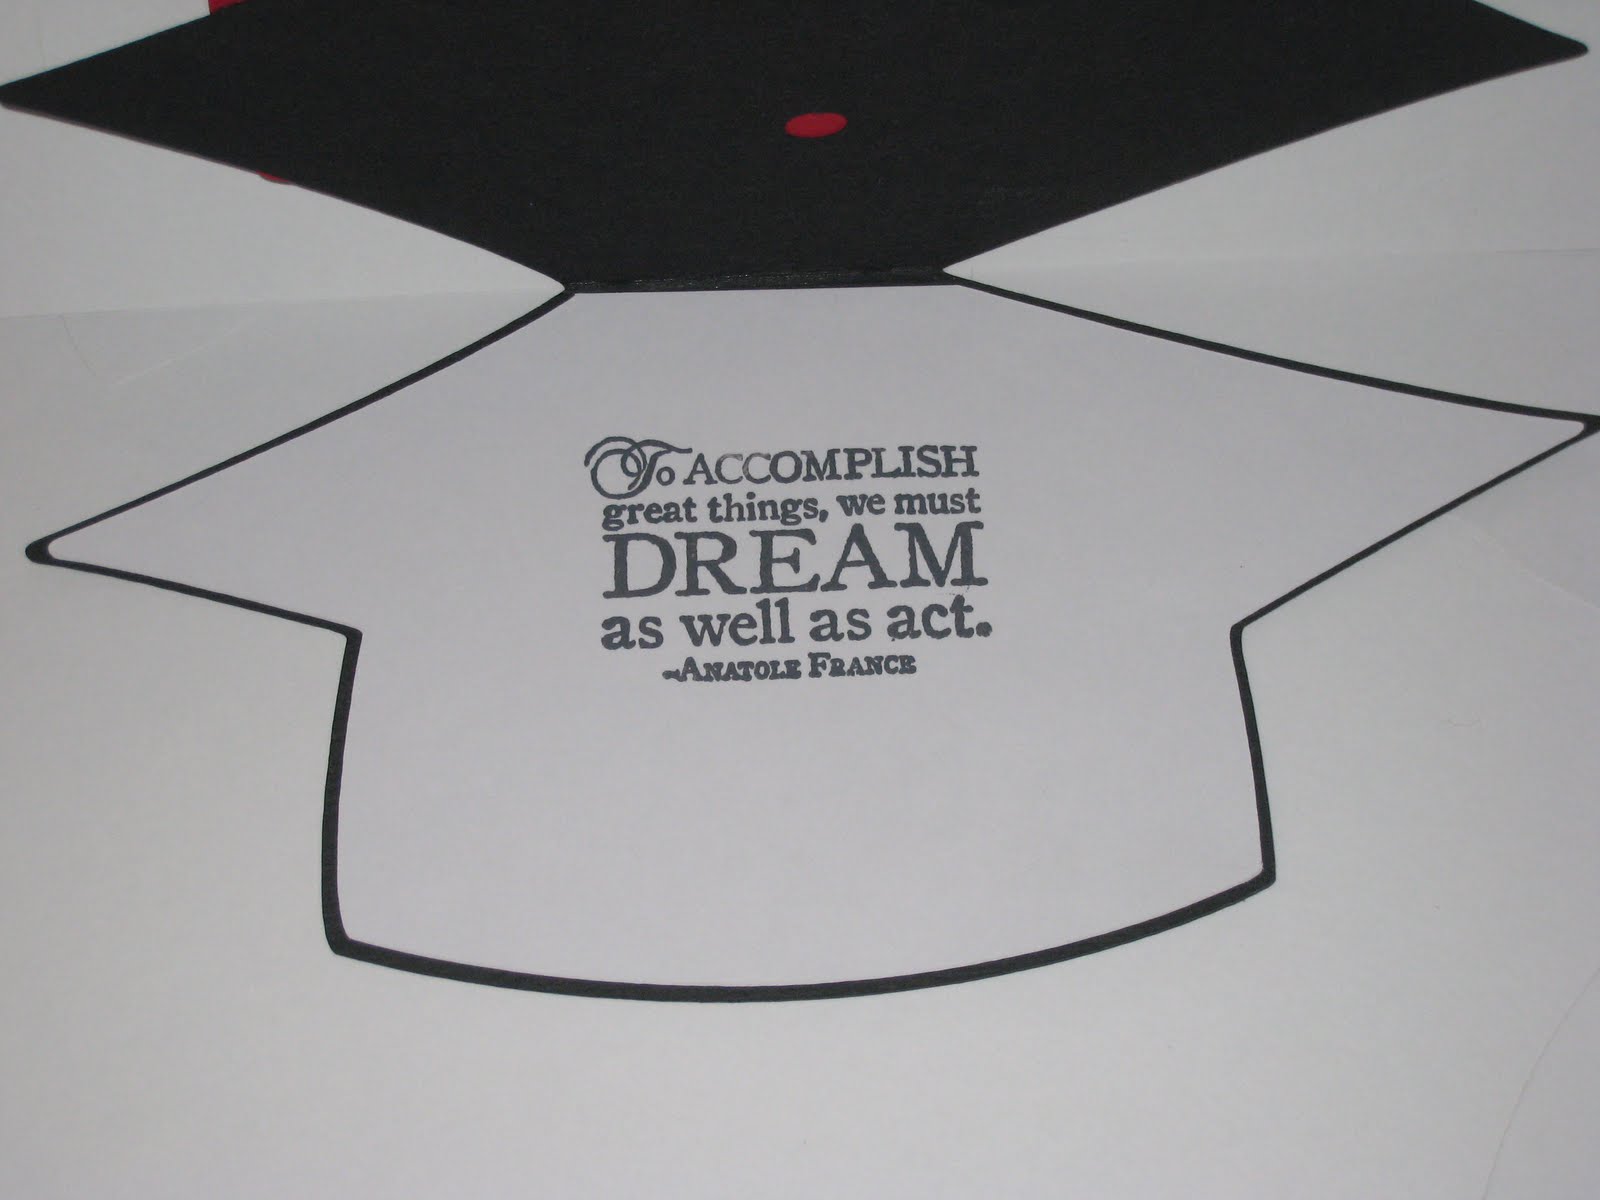
So, we had two graduation parties for the same day this past weekend. This card I made using the WILD CARD cartridge. I cut it at 8" along with the tassle and the 'For the graduate'. To make the inside white mat, I recut the card 1/4" smaller so that there would be a shadow and then just cut it in half. The inside sentiment is a stamp I got in a graduation collection.

Monday, June 7, 2010

Birthday Card


A birthday card made for a friend who loves owls. I bought the tree (BasicGray bling it) from Archivers. I cut the card 4" in a gate fold and cut both sides at the top to create the hills. I inked the hills and cut the owl from the Storybook cartridge

Happy Birthday Ro!


This is the card I made for my sister's birthday. I embossed the blue & green backgrounds with the Argyle folder and then cut the lady golfer a couple of times as I didn't like the color. When I cut the blackout for it, there was no way I would be able to line up the golf club when glueing so, I cut the black out club off and glued the pink one right to the paper. I also cut the hills, golf ball, sandy area, and flag & pole by hand since they were pretty east cuts. And the inside sentiment was recylced from a greeting card that I received for my BD. :) This was an A2 card and the golfer was cut using Sports Mania.

Monday, May 31, 2010

MPS Father's Day Challenge


My Father's Day Card for the MPS Challenge. We love football so I thought this would be a good one. Next best thing to an ND football card. :) Used DS to weld the Blackout football from Sports Mania together (flipped one so that they fold together correctly) and then cut the football out at 5 1/4". Used Plantin Schoolbook to make the words. All colored paper is Core'dinations cardstock.

Saturday, May 29, 2010

Soccer Picnic Loot Bags


Loot bags for the soccer team...also using Sports Mania cartridge.

Coach Card


Made this card for the soccer coach for the end of the 7-0 season they had. Used Sports Mania for the soccer balls & 'coach' and then created the 'You're the Best' on DS with the A Child's Year cartridge.

Monday, May 10, 2010

Gypsy

Happy Mother's Day to all, a day late but, I hope everyone had a great day! I am thrilled that by husband bought me a Gypsy for Mother's Day! I still don't know how to use it but, I printed the on line manual and I can't wait to get started!! Let's see what I can create!!! :)

Tuesday, May 4, 2010

I WON!!!

OMG! I WON, I WON, I WON! That's me in the kitchen all excited! How fun! This is only the second challenge I've done and I had fun doing it. Funny that my 'least favorite' card was the one that one...randomly, of course! =) My son might be having a Robotz party next year!!! WOOOHOOO!!!!

Monday, May 3, 2010

MPS National Scrapbook Day Challenges

So, there were 12 total challenges in 12 hours. I only completed 10 of them. I wanted to do them all but, I am sooo tired and just want to sleep. This is the second time I have done any challenge so, doing 10 of them is fantastic!!! Thanks Robyn at MPS for the challenge!

MPS Challenge #9 - A Shaped Card


The Ice cream cone!!!

MPS Challenge #8 - Monochromatic


Here was my stab at monochromatic....not my favorite at all but, a neutral and a color....

MPS Challenge #4 - Using your least favorite Cartridge


So, I used Tie the Knot for this card. It is not my least favorite but, I don't use it much so, I took the leap for something un-wedding related. It looks better in person with the pearl finished white paper behind the cherry blossom branch!

MPS Challenge #12 - An Animal Card


I have been wanting to cut this one for a while. I am really happy with how it turned out!!!

MPS Challenge #11 - use the colors of the Rainbow


Love this one!

MPS Challenge #10 - a card with a flower...or springy


Here is my creation using a flower. Really like the Citrus paper stack (maybe DCWV..will have to check that out)

MPS Challenge #6 - a card for a kid


Not sure which kid yet but, here's my gecko creation!

MPS Challenge #3 - Using something unusual


For this challenge, I used some of my wrapping stash....raffia ribbon for the vines that the monkey's are 'swinging' on.

MPS Challenge #2 - Using scraps


So, the 'card' sheet wasn't scraps but, the rest was. =)

MPS Mother's Card Challenge


A card for Mom!